If you're like me, you've often seen fantasy art and thought to yourself, "That would make a really neat Baldur's Gate portrait." However, the time it takes to get the image, scale it properly into three different files, etc., prevents you from doing much of that unless you plan to use the portrait yourself.
Now, that is no longer a problem! Now the world can be flooded with every possible Baldur's Gate (Enhanced Edition or original) portrait under the sun, because of this simple (Windows only, sorry) app that quickly grabs a section of the screen, scales it into the right dimension(s) and saves it with the proper name(s) for you.
So please go forth and make a bunch of really awesome portrait packs.
Thank you.
HOW TO USE:
0. Run the program.
1. Choose the directory you would like your portrait images to be saved into.
2. Enter the name you would like the files to have. Because of restrictions in Baldur's Gate, the file name cannot be longer than 7 characters.
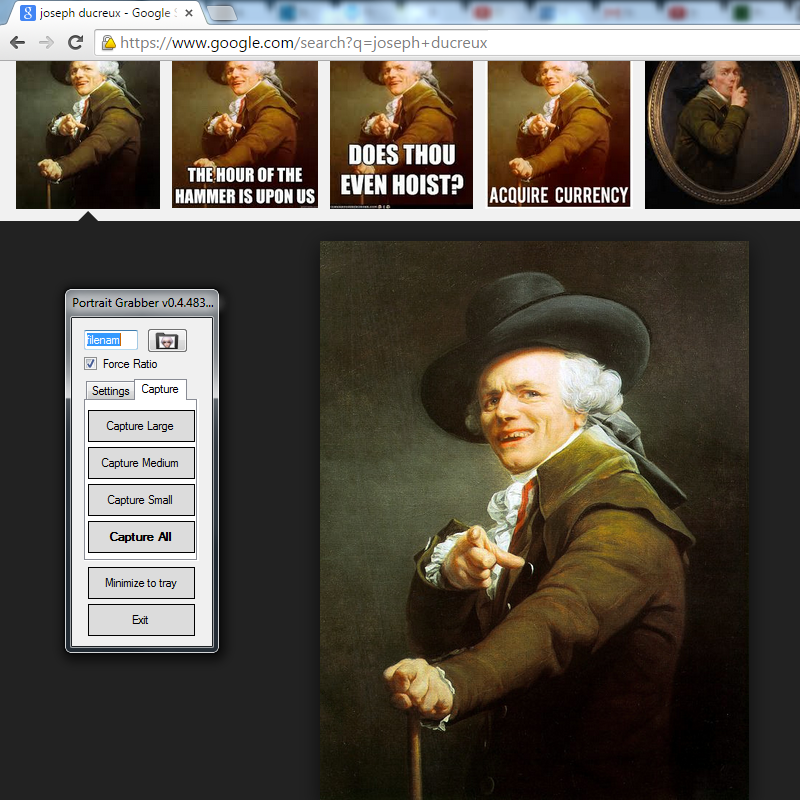
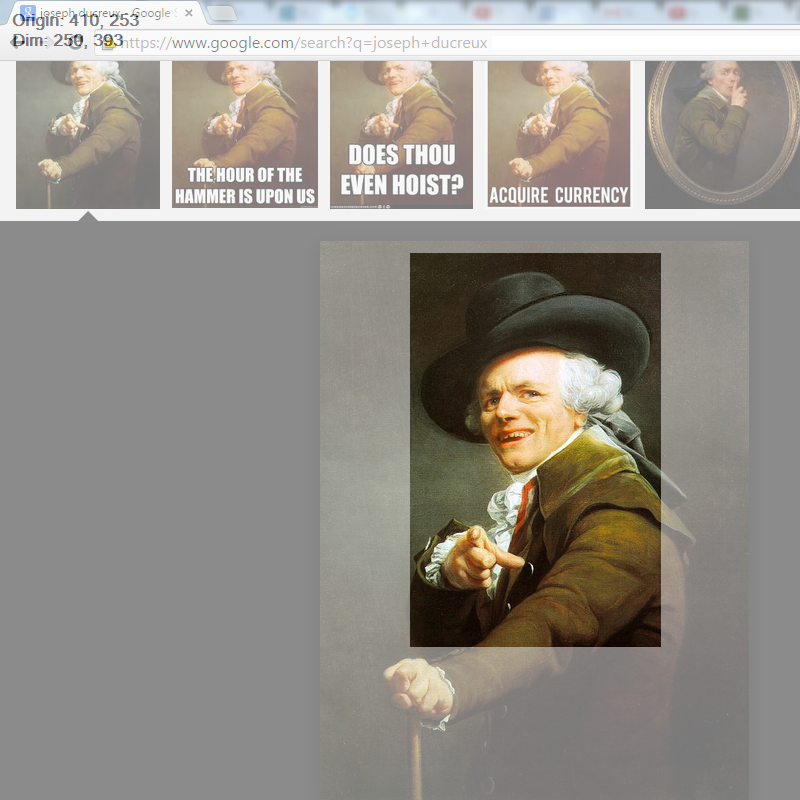
3. Click on the Capture tab. Click Capture Large, Capture Medium, Capture Small, or Capture All. The screen will go greyish.
4. Select the region you want to make into a portrait by left-clicking and dragging. (IMPORTANT NOTE: Dragging does not work as normally expected! The size of the selected region defaults to the dimensions expected used by the portrait. This means you should start your drag from the bottom-right corner of the portrait rather than the top-left. See the next step to find out how to adjust the top left corner.)
5. When you release the mouse button portrait will be taken. BUT if, while still holding the left mouse button, you press the right mouse button, the behavior will switch so that the bounding box moves with your mouse rather than being resized by it. Right click again to continue resizing.
Notes:
The Capture All button simply takes one screen capture area and converts it to all different image sizes. When you go to capture a new image, the old area will be pre-selected. Press SPACE or ENTER if you want to capture that area of the screen again without changing it at all.
I should mention that the only functional difference between BGEE mode and non-BGEE mode is their default values and the presence of a medium size. So feel free to use it to get non-BGEE portraits too, if you want a third portrait.
WHERE TO GET IT:
From the GitHub page: https://github.com/a...rabber/releases
Source code is also available there.
Edited by Alweth, 27 March 2015 - 04:23 AM.




![[MOD] Isandir's Portrait Pack - last post by K4thos](http://www.shsforums.net/uploads/profile/photo-thumb-6375.gif?_r=1404289774)
